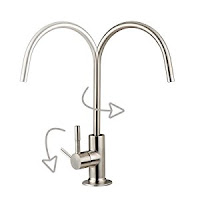
- European designer lead-free solid brass faucet. 360 degree free swivel
- Non "air gap" drinking water faucet. NOT a regular hot and cold water kitchen sink or bar sink faucet
- Ideal upgrade for undercounter water filters and reverse osmosis systems
- Oil Rubbed Black finish. May come with Quick Fitting or Jaco Fitting
- Backed by 3-year Manufacturer Warranty with lifetime support line 678-261-7611 from Alpharetta, GA USA.
Easy Rotation
360 degree spout meets all your needs.90 degree single handle provides effortless flow control.
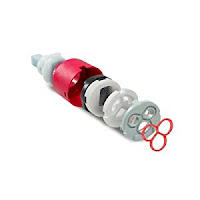
Top Notch Ceramic Valve
Multiple layers of environmental friendly parts ensure drinking water safety. The durable ceramic cartridge provides extreme temperature resistance, corrosion-proof , and durability for up to 500,000 times of use.
Easy Installation
The push-in quick fitting adapters ensure super easy leak-free installation. Recent upgrades for easy installation with push-in adapter included.
5 Different Finish
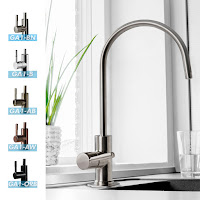
Modern design adds a great accent to your kitchen. 5 different stylish finishes make this faucet more elegant and special. Resists fingerprints and water spots. Easy to clean.
- BN - Brushed Nickel
- B - Luxury Chrome
- AB - Antique Brass
- AW - Antique Wine
- ORB - Oil Rubbed Black
- BN - Brushed Nickel
- B - Luxury Chrome
- AB - Antique Brass
- AW - Antique Wine
- ORB - Oil Rubbed Black
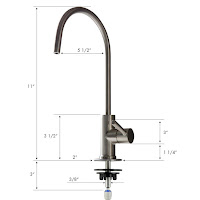
GA1 Faucet Dimemsion
- Faucet height: 11inches
- Plate diameter: 2 inches
- Stem diameter: 7/16 inches
- Stem height: 3 inches
- Sprout reach: 5 1/2 inches
Highlighted Features
The lead free 304 Stainless Steel inner tube dispenses safe drinking water thought the faucet.
Triple O-rings provide leak free seals.
Lead-free stainless coating brass ensures no Rust, no Metal precipitation into the water.
Installation Step 1
Make sure your countertop has an existing hole with a diameter between 0.5 to 2.0 inches. Remove the old RO faucet if you have one. Wipe clean and dry the area. Slide the front plate onto the faucet stem, followed by the rubber washer. Insert the stem into the hole on the countertop.
Installation Step 2
Under the sink, slide on the back rubber washer and tight the wing nut. (You may apply a few rounds of Teflon tape to the threads to get a better grip).
Installation Step 3
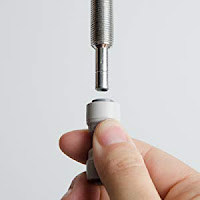
Slide the push-in fitting up the push-in adapter on the base, then lock it in place by sliding the blue clip under the collet.
Installation Step 4
Insert your water tubing (not provided) about 1/2 inch into the push, and again, secure it with the blue clip.
Connect the water and Inspect carefully for any leaks.









No comments:
Post a Comment